
Table of Contents
- Why Candles Don't Burn Evenly: Understanding Tunneling and Uneven Melt Pools
- How Long to Burn a Candle for the First Time
- Candle Wick Trimming Best Practices
- How to Fix Candle Tunneling with the Aluminum Foil Method
- Using a Hair Dryer and the Spoon Technique for Even Wax Distribution
- Environmental Factors That Affect Even Burning
- Choosing the Right Candle: Wick Type and Wax Blend Matter
- Conclusion
Last Updated: August 26, 2026
Why Candles Don't Burn Evenly: Understanding Tunneling and Uneven Melt Pools
Candle tunneling occurs when the center burns faster than the outer edges, leaving unburned wax around the sides. The wick draws heat downward while the outer wax never reaches its melting point, resulting in wasted wax, poor scent throw, and uneven burning for the candle's life.
The culprit is usually the memory ring. When you light a candle for the first time, the wax around the wick melts and creates a melt pool. If that pool doesn't reach the edges, the outer wax hardens into a ring. On every subsequent burn, the flame never melts past that boundary, trapping you in tunneling.
Several factors contribute to uneven burning: a wick that's too thin won't generate enough heat to melt the full diameter, while one that's too thick creates excessive heat and fast burning. Room temperature, drafts, and wax blend all play roles too. The good news is that uneven burning is preventable and often fixable.
How Long to Burn a Candle for the First Time
The first burn should last until the entire surface melts into a full melt pool, typically 2 to 4 hours depending on candle size and wick type. A 10oz candle usually needs 2-3 hours, while a 3-wick candle may require 3-4 hours. Don't cut this short.
If you blow out the candle before the melt pool reaches all edges, you create that memory ring. The wax hardens in that incomplete pattern, and every subsequent burn follows the same path. You've programmed the candle to tunnel.
Burn until you see a full, even melt pool across the entire surface, one continuous pool of melted wax from edge to edge. The wax should look glossy and wet, not dull or patchy. All wicks should generate similar flame height and heat.
Candle Wick Trimming Best Practices
Wick trimming is one of the simplest and most effective ways to ensure even burning. Trim your wick to 1/4 inch before each burn, the sweet spot for most candles.
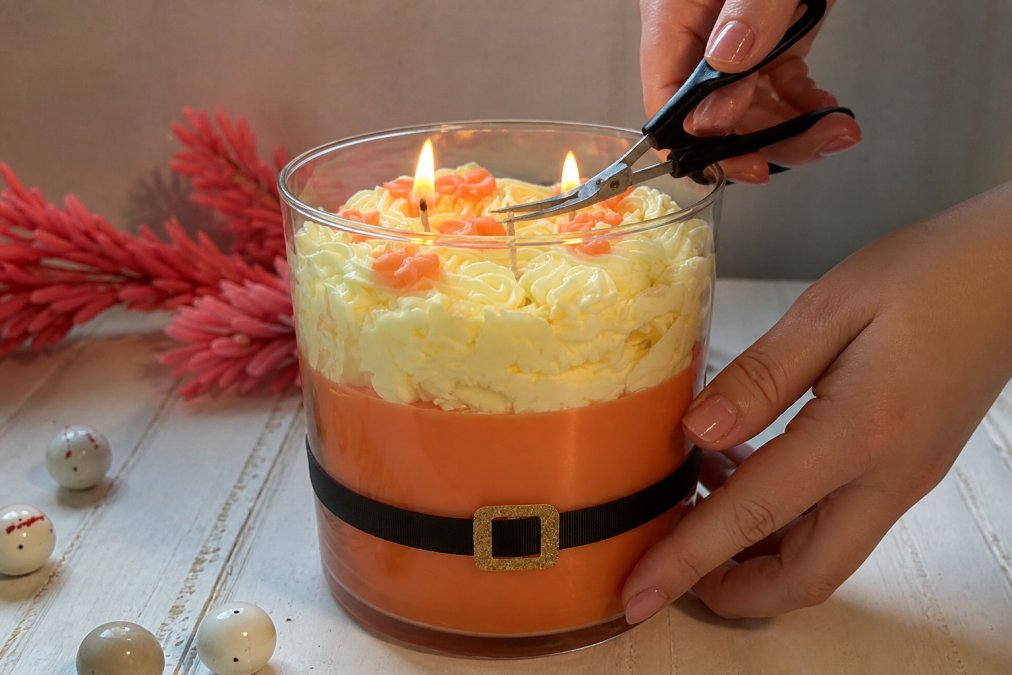
A wick that's too long generates excessive heat, causing fast and uneven burning, black soot on the jar, and mushrooming (black, crusty buildup on the wick tip). A wick that's too short won't generate enough heat to melt the full diameter, leaving outer edges untouched and leading directly to tunneling.
Wooden wicks may require slightly longer trimming (up to 3/8 inch) to generate sufficient heat, while cotton wicks perform best at 1/4 inch. Always trim before relighting, never after. Use small scissors or a wick trimmer, never pull or pinch the wick.

How to Fix Candle Tunneling with the Aluminum Foil Method
If your candle is already tunneling, the aluminum foil method is a quick fix that works for most situations. Create a collar of aluminum foil around the top edge of the jar, leaving the center open above the wick. The foil should extend about 1 inch down the inside. When you light the candle, the foil reflects heat back onto the outer wax, encouraging it to melt. You'll typically see the melt pool expand within 30-60 minutes.
Once the melt pool has expanded to cover the full diameter, remove the foil and let the candle burn normally. Ensure the foil doesn't touch the flame, it should reflect heat, not conduct it directly into the fire.
Using a Hair Dryer and the Spoon Technique for Even Wax Distribution
Two additional techniques can help redistribute wax and restore even burn: the hair dryer method and the spoon technique.
The hair dryer method uses low heat to gently warm the outer edges of the candle's wax pool. Direct warm air toward the sides where wax hasn't melted, being careful not to overheat the container or wick. Typically, 2-3 minutes of gentle heat encourages the outer wax to soften and level out.
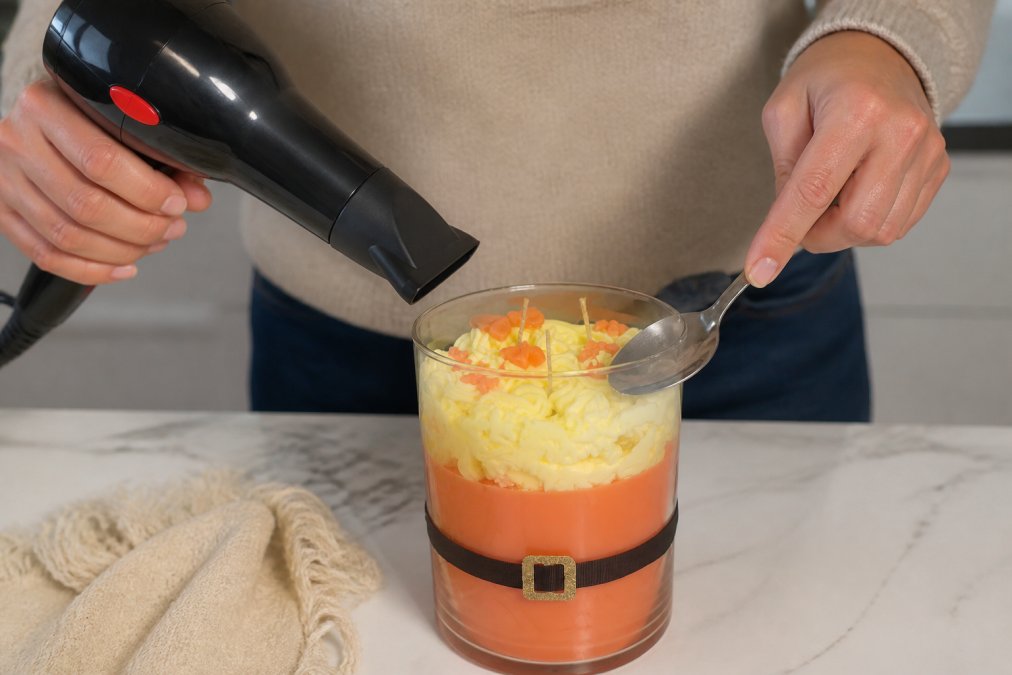
The spoon technique is more hands-on. Use a metal spoon to gently redistribute melted wax from the center toward the outer edges. Work slowly and carefully, guide the soft wax outward rather than scraping. This method requires patience but gives direct control over wax distribution.
Both techniques work best during or immediately after a burn when wax is soft and pliable. Many people combine both: use the hair dryer to soften edges, then use the spoon to redistribute wax if needed.
Environmental Factors That Affect Even Burning
Drafts and air currents are major culprits behind uneven burning. A breeze from an open window, air conditioning vent, or ceiling fan can push the flame to one side, causing uneven melt pools. Position your candle away from windows, doors, vents, and fans in a stable interior location.
Room temperature influences burn quality. Candles burn best between 65-75°F (nfpa.org). Cold rooms slow wax melting and prevent the melt pool from reaching edges. Excessively warm rooms can cause the wax to soften too much, leading to uncontrolled melt pools.
The vessel itself plays a role too. Dark-colored containers absorb more heat and speed up burning, while clear or light-colored jars reflect heat and may slow burning slightly. Larger diameter vessels require longer, hotter burns to achieve a full melt pool.
Choosing the Right Candle: Wick Type and Wax Blend Matter
Not all candles are created equal. The wick type and wax blend have a profound impact on how evenly a candle burns.
Wick type determines heat generation and distribution. Cotton wicks are the most common and reliable for scented jar candles, burning cleanly with steady heat. Wooden wicks create a wider flame and cozy crackle but require careful attention in wider containers. The wick should be sized appropriately for the candle's diameter, too thin won't generate enough heat, too thick will overheat and cause rapid, uneven burning.

Wax blend affects melting point, burn temperature, and evenness. Paraffin wax has a melting point around 130-150°F and burns hot and clean (peer-reviewed research). Soy wax melts at a lower temperature (around 120-180°F) and burns more slowly, often producing a larger, more even melt pool (peer-reviewed research). Blended waxes combine both to balance benefits: faster scent throw from paraffin and cleaner, slower burn from soy.
Higher-quality soy blends tend to burn more evenly because they melt at moderate temperatures, giving wax time to reach all edges before the center burns too deeply. When selecting a candle, look for products where the maker has clearly matched the wick to the container and chosen a wax blend suited to the jar size. Handmade, artisanal candles like those from Carbondale Candle are formulated with these details in mind, reducing tunneling likelihood and ensuring better overall burn experience.
Making candles burn evenly comes down to three core principles: nail the first burn, trim the wick before each lighting, and position the candle in a stable environment. These steps prevent most tunneling and uneven burning problems before they start. If tunneling does occur, the aluminum foil method, hair dryer technique, and spoon method can often restore an even burn. Choosing a well-made candle with the right wick-to-container ratio and quality wax blend sets you up for success from the beginning. Carbondale Candle's hand-poured scented jar candles are designed with these principles in mind, ensuring that every candle burns cleanly and evenly for hours of enjoyment. Start with one of our 10oz Frosted Jar Candles or upgrade to a larger 3-wick option for a more dramatic, even burn experience.
=== FAQ ANSWERS (audit these too, same rules) ===
Frequently Asked Questions
Q: What causes candles to burn unevenly?
A: Candles burn unevenly when the melt pool doesn't reach the edge of the jar, creating a tunnel down the center. Common causes include wick size mismatch, drafts, not burning long enough on the first use, and improper room temperature. The first burn is critical, if the melt pool doesn't reach the jar's edge within 2-4 hours, the candle will tunnel for the rest of its life. High-quality, hand-poured candles like those from Carbondale Candle are designed with proper wick sizing and wax blends.
Q: How do I fix a candle that's already tunneling?
A: The aluminum foil method is the most effective fix for candle tunneling. Wrap foil around the top edge of the jar, creating a tent that directs heat back down into the wax. Alternatively, use a hair dryer on low heat to warm the outer wax edges until they melt evenly. For severe tunneling, the spoon technique works well: gently scrape softened wax from the sides toward the center to redistribute it. These fixes work best when applied early, before significant tunneling occurs.
Q: How long should I burn a candle the first time?
A: Burn your candle for 2-4 hours on the first use, until the melt pool reaches the outer edge of the jar. This establishes the candle's memory ring, the wax remembers how far it melted. If you stop burning before the melt pool reaches the edges, the candle will tunnel every time you light it afterward. For larger candles like Carbondale Candle's 90oz three-wick options, aim for 3-4 hours to ensure full wax pool development across all three flames.
Q: Why is wick trimming important for even burning?
A: Trimming the wick to 1/4 inch prevents mushrooming, carbon buildup, and excessive heat that can cause uneven melting. A wick that's too long creates a larger flame, which generates too much heat and can melt wax unevenly or cause soot. Trimming before each burn ensures consistent flame size, even heat distribution, and a cleaner, more controlled melt pool. This simple step is one of the most effective ways to make candles burn evenly.
This article was written using GrandRanker