
Table of Contents
- What Is Candle Tunneling and Why It Happens
- How Long to Burn a Candle for the First Time
- Proper Wick Trimming Techniques to Stop Tunneling
- Manage Your Burn Environment
- How to Fix Candle Tunneling Once It Starts
- Wax Type and Container Size Matter
- Common Candle Burning Mistakes to Avoid
- Conclusion
Last Updated: August 30, 2026
What Is Candle Tunneling and Why It Happens
Candle tunneling occurs when a candle burns down the center, leaving thick walls of unmelted wax around the sides. Only a narrow tunnel forms down the middle, wasting wax and reducing the candle's lifespan significantly.

When you light a candle, the flame heats the wick and surrounding wax, creating a wax pool of melted liquid on the surface. If that pool doesn't reach the container edges before the wick burns down, the outer wax cools and hardens around a narrower center. On the next burn, the flame only accesses that same narrow tunnel, and the problem repeats and worsens with each lighting.
The root cause is usually an undersized wick that doesn't generate enough heat to melt wax all the way to the edges. Environmental factors like drafts, air conditioning, or windows also cool the outer wax faster than the center can melt it.
At Carbondale Candle, we design our hand-poured scented jar candles with proper wick sizing to prevent tunneling from the start.

How Long to Burn a Candle for the First Time
The first burn is the most important. This is when the candle's memory ring forms, the diameter of the wax pool on that first burn essentially "remembers" how wide the melt pool should be for all future burns.
For most container candles, burn them for at least 2-4 hours on the first use to melt wax all the way to the edges (peer-reviewed research). A standard 10oz jar candle like our 10oz Frosted Jar Candle, Scented typically needs 3-4 hours. Larger candles, like our Anytime Special 90oz, 3 wick Custom Candle, may require 4-6 hours because the wax has more surface area to cover.


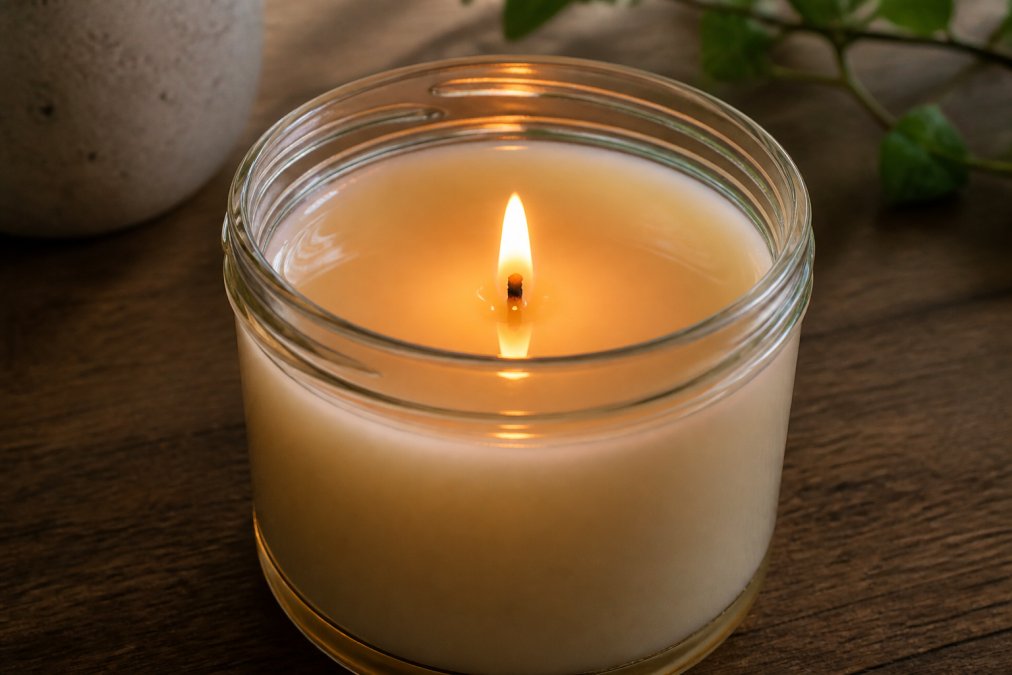
Watch for the wax pool to reach the outer edges. Once the liquid wax touches the container walls, you can safely blow out the candle. Don't rush this process, cutting the first burn short guarantees tunneling later.
Proper Wick Trimming Techniques to Stop Tunneling
A properly trimmed wick controls flame height, heat output, and how evenly wax melts. The ideal wick length is 1/4 inch, roughly the length of a grain of rice. Before each burn, trim your wick to this measurement.
When a wick is too long, unburned carbon accumulates on the tip in a mushroom-shaped formation. This buildup increases heat output, produces soot, and creates an unstable, flickering flame that contributes to tunneling. A wick that's too short produces a weak flame that doesn't generate enough heat to melt wax to the container edges, leading directly to tunneling.
Visual diagnostic guide for wick problems:
- Mushroom or bulb at the tip: Trim to 1/4 inch before relighting.
- Very small, barely visible flame: Wick is too short; this causes tunneling. Allow longer burns and trim less aggressively next time.
- Tall, bright, flickering flame: Wick is too long or there's a draft. Trim to 1/4 inch and move the candle away from air movement.
- Black soot on jar walls: Wick is too long or candle is in a draft. Trim the wick and check your burn environment.
- Flame leans to one side: Usually a draft, but ensure the wick is trimmed to 1/4 inch first.
How to trim correctly. Always trim before relighting, not after cooling. Use sharp scissors or dedicated wick trimmers, never pinch, pull, or break the wick by hand, as this damages fibers and creates hot spots that contribute to tunneling. Let the wick cool completely after blowing out the candle, then trim away any mushroomed carbon before the next burn.
Wick sizing is determined during manufacturing based on container diameter and wax type. A wick perfect for a 3-inch jar will be undersized for a 4-inch jar. Proper wick sizing by the manufacturer is non-negotiable for preventing tunneling.
Manage Your Burn Environment
Where you burn your candle matters as much as how you light it.
Drafts are the enemy. Air conditioning, ceiling fans, open windows, and foot traffic cool one side of the wax pool faster than the other, causing uneven melting and tunneling. Position your candle away from vents, fans, and drafty areas. If the flame flickers or leans to one side, move the candle to a calmer spot.
Room temperature plays a role. Cold rooms slow wax melting; the outer edges solidify before fully melting. Very warm rooms cause wax to melt too quickly and unevenly. Aim for a moderate, stable room temperature around 70-72°F (nist.gov).
Container placement matters too. Keep candles on level, heat-resistant surfaces away from direct sunlight, which can warm one side unevenly. Avoid bedrooms with ceiling fans, kitchens with active ventilation, or bathrooms with fluctuating steam and humidity. Living rooms or bedrooms with stable conditions are typically best.
How to Fix Candle Tunneling Once It Starts
If your candle has already tunneled, a few repair methods exist, though prevention is always easier than repair.
When to repair vs. when to replace. If the tunnel is shallow (less than 1/2 inch of unmelted wax) and the candle is in early burn cycles, repair is worth attempting. If the tunnel is deep (more than 1 inch) and the candle is halfway through its life, the wax walls are likely too thick to melt evenly. In those cases, it's safer to retire the candle.
The aluminum foil method (safest option). Wrap aluminum foil loosely around the top of the candle, leaving the wick exposed. The foil reflects heat back toward the outer wax edges. Light the candle and let it burn for 1-2 hours. The reflected heat should gradually soften the hardened wax walls.
Safety notes: Ensure foil doesn't touch the flame or hang into the candle. Keep it at least 1/2 inch away from the flame. Never leave the candle unattended. This method works best for mild tunneling; deeper tunnels may need multiple sessions.
The heat gun method (faster but higher risk). Use a low-heat setting on a hair dryer or heat gun to warm the outer wax walls. Hold it 6-8 inches away and move it slowly around the edges in circular motions.
Safety precautions: Never use the highest setting; excessive heat can crack the glass. Don't point heat directly at the flame. Keep the heat gun moving constantly. Never heat for more than 30 seconds at a time; allow cooling between applications. If the container becomes too hot to touch, stop immediately.
The spoon method (most labor-intensive). Carefully scrape hardened wax from the walls using a metal spoon and push it toward the center while the candle is burning.
Safety precautions: Only perform this while the candle is actively burning and the center wax is soft. Never scrape a cold, unlit candle; you risk cracking the container or breaking the wick. Use gentle, downward strokes along the inner wall, then push scraped wax into the melt pool. Work slowly and avoid sudden movements.
Why repairs often fail. Even successful repairs are temporary. Once a candle has tunneled, the wax memory is set; the candle will tend to tunnel again unless you change burn habits. Repairs buy time to use remaining wax but don't reset the candle's burning pattern.
The best approach is always to prevent tunneling by following proper burning practices from the first light.
Wax Type and Container Size Matter
Not all wax behaves the same way, and the container directly affects how your candle burns.
Soy wax has a lower melting point than paraffin wax, making it melt more easily and spread more readily across the container. This makes soy wax naturally more resistant to tunneling. However, soy wax is softer and more prone to sweating or uneven surfaces.
Paraffin wax holds color and scent exceptionally well but has a higher melting point, requiring more heat to melt fully. This makes it more susceptible to tunneling if the wick is undersized or burn time is too short.
Container size is equally important. A wide, shallow container needs a larger wick and longer burn time than a narrow, tall container of the same volume. Proper wick sizing during manufacturing is critical.
At Carbondale Candle, our hand-poured scented jar candles are designed with container size and wax type in mind, matched with appropriate wicks to ensure an even burn from the first light.
Common Candle Burning Mistakes to Avoid
Burning candles for too long is surprisingly common. While the first burn should reach the edges, subsequent burns shouldn't exceed 4-6 hours (peer-reviewed research). Extended burns cause the flame to grow larger and hotter, overheating the container, damaging the wick, and creating excessive soot.
Never relight a candle immediately after blowing it out. The wick is still hot, and relighting too quickly causes the flame to flare up or burn irregularly. Wait at least 2-3 minutes before relighting.
Burning candles in drafty or humid environments causes uneven burns and tunneling. Humidity and air movement are major culprits behind burning problems.
Ignoring soot buildup indicates the wick is too long or the candle is burning in a draft. Address it immediately; soot reduces scent throw and indicates inefficient burning.
Using the candle as a decorative object only means you're not actually burning it. Candles are meant to be burned. Occasional lighting makes tunneling more likely because the wax doesn't get regular, consistent heat.
Conclusion
Preventing candle tunneling comes down to three core practices: burning your candle long enough on the first light to establish a proper memory ring, trimming the wick to 1/4 inch before each burn, and maintaining a stable burn environment free from drafts. These habits ensure your candle burns evenly, lasts longer, and delivers the full scent experience you're paying for.
Frequently Asked Questions
What is the 3-hour rule for candles?
The 3-hour rule means you should burn your candle for at least 2-3 hours during the first burn to establish a full wax pool across the entire diameter of the jar. This prevents candle tunneling by creating a memory ring, the candle's wax remembers how far it melted on that first burn. If you only burn it for 30 minutes, the wax pool won't reach the edges, and future burns will tunnel down the center, wasting fragrance and wax.
Can you reverse candle tunneling?
Yes, you can fix mild to moderate tunneling using the aluminum foil method or a heat gun, which redirects heat to melt the built-up wax around the edges. However, severe tunneling is harder to fix completely. Prevention is far more effective than reversal. Once you fix the tunneling, restart proper burning habits, a full 2-3 hour first burn and regular wick trimming, to prevent it from happening again.
Does trimming the wick prevent tunneling?
Wick trimming helps prevent tunneling by controlling flame height and heat distribution. A wick that's too long creates excessive heat, causing the wax pool to burn unevenly and tunnel. Trim your wick to 1/4 inch before each burn. Proper wick trimming keeps the flame at an ideal height, ensures even melting, and reduces mushrooming and carbon buildup, all of which contribute to tunneling.
How to stop candles from sinking in the middle without foil?
Use a heat gun on low setting, holding it 6-8 inches above the candle's surface, moving it back and forth to gently melt the outer wax edges. This takes 2-3 minutes per session. Alternatively, burn your candle longer on the next use to help the wax pool reach the edges naturally. The best long-term solution is proper first-burn technique: always burn for 2-3 hours initially to create a full wax pool and prevent sinking in the first place.
At Carbondale Candle, we craft hand-poured scented jar candles with proper wick sizing and premium wax to prevent tunneling from the start. Our 10oz Frosted Jar Candle, Scented and larger options are designed to burn beautifully when you follow these practices. Get Lit With Us and experience candles that burn the way they're meant to, evenly, completely, and with the full fragrance throw you deserve.
This article was written using GrandRanker