
Table of Contents
- Why You Should Trim Your Candle Wick
- How Long Should a Candle Wick Be for Optimal Burning
- When to Trim Your Candle Wick
- Best Candle Wick Trimmer Tools and Alternatives
- Step-by-Step Instructions for Trimming Your Candle Wick
- Understanding Candle Tunneling Causes and Prevention
- Common Mistakes to Avoid When Trimming
- Safety Precautions for Candle Maintenance
- Frequently Asked Questions
Last Updated: September 19, 2026
Why You Should Trim Your Candle Wick
Trimming your candle wick is one of the simplest ways to improve how your candle burns. A wick that's too long creates problems. It produces excess smoke, creates soot buildup on your jar, and wastes wax.
When you trim regularly, your candle burns cleaner and lasts longer. You'll notice less black residue on the glass. The flame stays steady instead of flickering wildly. At Carbondale Candle, we recommend trimming before every burn to get the best performance from your hand-poured candles.
An untrimmed wick also causes uneven burning. The flame gets too tall and hot. This can damage the vessel and create safety hazards. Proper wick maintenance prevents these issues entirely.
The good news? It takes just 30 seconds. Once you know how to trim a candle wick step by step, it becomes part of your regular candle care routine.
How Long Should a Candle Wick Be for Optimal Burning
The ideal wick length is 1/4 inch above the wax pool. This simple measurement makes all the difference in how your candle performs.
A 1/4 inch wick produces the right flame height. The flame should be about 1/2 inch tall when lit. This height burns the wax evenly and creates proper scent throw without excess smoke.
Wicks that are too short don't burn hot enough. The flame struggles to stay lit. The candle may self-extinguish or burn unevenly, creating tunneling where only the center melts.
Wicks that are too long create the opposite problem. The flame becomes too large and hot. This causes:
- Excessive smoke and soot
- Black buildup on the jar sides
- Faster wax consumption
- Potential fire safety issues
- Uneven melt pool formation
The 1/4 inch rule works for most candle types. Whether you're burning soy wax, paraffin, or other blends, this length keeps the flame stable and the burn clean.
When to Trim Your Candle Wick
Trim your wick before every burn. This is the best practice for candle maintenance.
Before you light the candle, check the wick length. If it's longer than 1/4 inch, trim it back. This takes just seconds and prevents all the problems that come with overgrown wicks.
You should also trim if you notice:
- Black soot building up on the jar
- A flame that flickers excessively
- Smoke rising from the candle
- Uneven melting in the wax pool
- A wick that mushrooms at the tip
Mushrooming happens when carbon accumulates at the wick's end. The wick curls over and creates a larger, hotter flame. Trimming removes this buildup and restores normal burning.
Some people trim only when they see problems. A better approach is preventive trimming. Do it every time before lighting. Your candles will burn cleaner, smell better, and last significantly longer.
If you're burning a candle for the first time, trim before that first light. This sets up the candle for success from the start.
Best Candle Wick Trimmer Tools and Alternatives
A proper wick trimmer makes the job easier and more precise. The best trimmers have sharp blades and a design that lets you reach into the jar safely.
Dedicated candle wick trimmers are the top choice. They feature:
- Long handles that keep your fingers away from heat
- Sharp blades that make clean cuts
- A catch tray to collect debris
- Ergonomic design for easy use
These tools cost very little and last for years. They're worth having if you burn candles regularly.
DIY alternatives work in a pinch:
- Scissors: Use sharp craft scissors or kitchen shears. Trim carefully to avoid bending the wick.
- Nail clippers: Small and precise, but harder to control. Good for thin wicks only.
- Utility knife: Sharp but requires more care. Not ideal for reaching into jars.
- Tweezers: Can pull away loose carbon buildup. Use alongside another trimming method.
The downside of DIY tools is safety and precision. Reaching into a jar with scissors risks burns. You might accidentally cut the wick too short or bend it.
A dedicated trimmer gives you the best control. For Carbondale Candle customers who burn multiple candles, a trimmer is a worthwhile investment. The few dollars spent saves time and prevents wasted candles.
Step-by-Step Instructions for Trimming Your Candle Wick
Step 1: Let Your Candle Cool
Never trim a wick on a hot candle. Wait at least two hours after blowing out the flame.
A warm wax pool is soft and unstable. Trimming while it's warm risks pushing the wick off-center or damaging the vessel. Cool wax is solid and safe to work with.
Anytime Special 90oz, 3 wick, Custom →
If you're trimming before the first burn, this step doesn't apply. Just make sure the candle is at room temperature.
Step 2: Measure and Mark the 1/4 Inch Length
Look at your wick carefully. Estimate where 1/4 inch above the wax pool falls.
If you want to be precise, hold a ruler or measuring tape next to the wick. Mark the spot mentally or with a light pencil mark on the jar (which you can wipe away later).
1/4 inch is about the width of a pencil eraser. Use this as a visual guide if you don't have a ruler handy.
Step 3: Make a Clean Cut
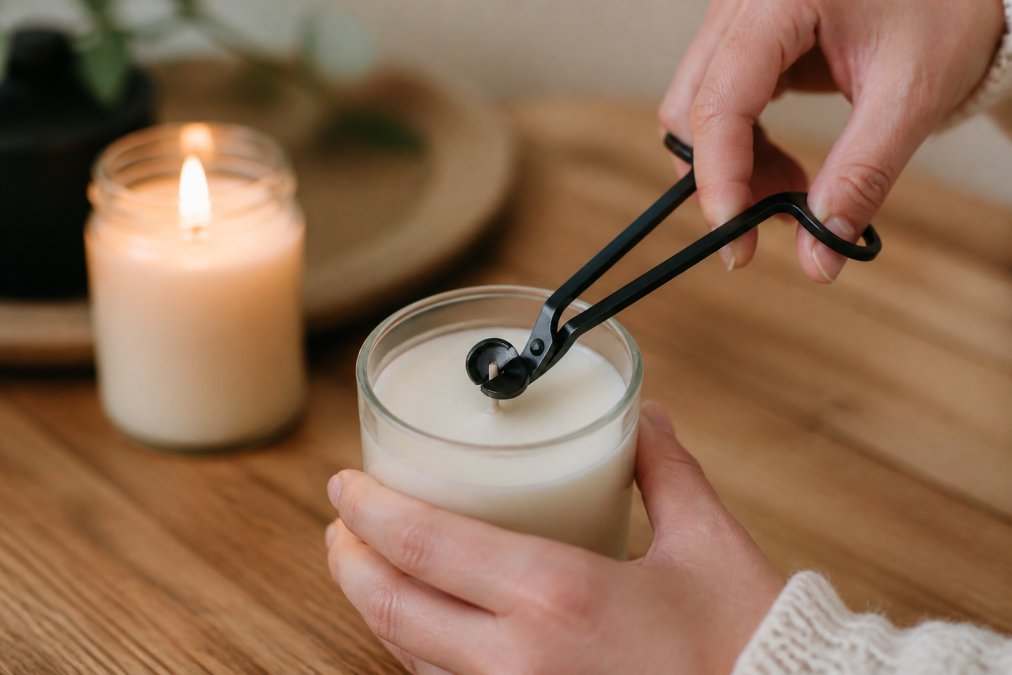
Position your trimmer or scissors at the 1/4 inch mark. Cut straight across the wick, not at an angle.
A straight cut prevents the wick from bending or fraying. The blade should be sharp so it cuts cleanly rather than crushing the wick fibers.
If using a dedicated trimmer, position the catch tray under the wick first. This catches the trimmed piece and keeps your candle clean.
Step 4: Remove Debris from the Wax Pool
After trimming, small pieces of wick may fall into the wax. Remove these carefully.
Use tweezers to pick out any visible debris. This prevents the pieces from interfering with the next burn or affecting how the candle looks.
If carbon buildup has accumulated on the wax surface, gently scrape it away with a spoon or butter knife. A clean wax pool burns better and looks better.
Step 5: Test Your Flame
Light the candle and observe the flame for the first few minutes.
The flame should be steady and about 1/2 inch tall. It should not flicker excessively or produce visible smoke. The melt pool should spread evenly across the surface.
If the flame is still too tall or produces smoke, let it burn for a minute, then blow it out and trim again. If the flame is too small or struggles to stay lit, you may have trimmed too short. Wait for the next burn and trim more conservatively.
Understanding Candle Tunneling Causes and Prevention
Tunneling happens when the candle burns down the center, leaving a ring of unmelted wax around the sides. This wastes wax and shortens the candle's life.
The main cause of tunneling is an oversized flame. When the wick is too long, it burns hotter than the surrounding wax can melt. The center burns deep while the edges stay solid.
Improper wick length is the #1 reason tunneling occurs.
Other tunneling causes include:
- First burn too short: Let the candle burn long enough for the entire top to melt on the first use. This usually takes 2-3 hours.
- Moving the candle while burning: Shifting a lit candle disrupts the melt pool and causes uneven melting.
- Drafts: Air currents can push the flame to one side, creating uneven heat.
- Room temperature: Very cold rooms slow melting. Burning in a warmer space helps.
Common Mistakes to Avoid When Trimming
Trimming too short is a common error. A wick under 1/4 inch won't produce enough heat. The flame becomes weak and may struggle to stay lit. The candle will smell faint because the wax isn't getting hot enough to release scent.
Safety Precautions for Candle Maintenance
Candle safety starts with proper maintenance. A well-trimmed wick is safer than an overgrown one.
Frequently Asked Questions
Can you use regular scissors to trim a candle wick?
Yes, regular scissors work if you don't have a dedicated wick trimmer. Clean scissors with sharp blades make a parallel cut, which is what matters most. Avoid dull or serrated blades that can crush the wick instead of cutting cleanly. Nail clippers are another common DIY alternative. The key is achieving a straight, clean cut at 1/4 inch, the tool matters less than the result.
What is the ideal length for a candle wick?
The ideal wick length is 1/4 inch above the wax pool before each burn. This measurement prevents excessive mushrooming, soot buildup, and flickering flames while promoting an even burn and proper melt pool formation. If your wick is longer, it will burn too hot and create carbon buildup. Too short, and the flame may struggle to stay lit or the candle won't reach full melt pool width.
What happens if you don't trim your candle wick?
Untrimmed wicks cause multiple problems: mushrooming (carbon buildup at the tip), excessive soot, black smoke, a flickering or dancing flame, and tunneling where only the center melts. These issues waste wax, shorten burn time, and can damage your vessel or ceiling. Hand-poured candles like ours are designed to burn cleanly when properly maintained, trimming is essential to get the full scent throw and lifespan you paid for.
How do I remove wick trimmings from the wax pool?
After trimming, wait for the wax to cool and solidify slightly, then gently scrape or pick out the debris using a small tool like a butter knife or wick dipper. Alternatively, if the wax is still warm, use a paper towel to carefully lift the trimmings away. Never leave debris in the melt pool, it can interfere with the flame and affect how the candle burns on future uses.